
ClickFunnels Shopping Cart And Order Form Tutorial
You can consider this the step-by-step ClickFunnels shopping cart tutorial.
So if you happen to be wondering the following question:
Does ClickFunnels have a shopping cart?
The answer is yes!
And in this blog post, I’m going to be showing you a tutorial for quickly setting it up.
Let’s get started as soon as possible.
How To Setup The ClickFunnels Shopping Cart
So this tutorial is going to be helpful for:
- Current ClickFunnels users (and/or).
- Anyone who hasn’t gotten started with a ClickFunnels trial yet.
If you already have ClickFunnels, then be sure to follow along with the specific steps.
If you haven’t gotten your ClickFunnels trial yet?
Helpful Note: Current ClickFunnels customers can also use the link above to sign in.
Let’s move to the first step.
Creating Your Funnel With A ClickFunnels Checkout Page

So make sure that you have either:
- Signed into ClickFunnels (or).
- Signed up for your free ClickFunnels trial.
Both of which can be accomplished using the link that I added in the previous section.
Once you are on your main dashboard:
- Hover over the ClickFunnels tab at the top of the page.
- In the drop-down list, be sure to click on the Funnels tab that appears.
The main idea is that you get taken to the page with all of your sales funnels.
Once you are on your main funnels dashboard:
- Click on the dark-yellow + Add New button at the top of the page.
- A popup will then appear as shown in the picture added above.
- Click on the dark-yellow + Create New Funnel button.
You will then have three options to choose from in the next section:
- Collect emails.
- Sell your product.
- Lastly, is host webinar.
Given the fact that we are going to be utilizing the ClickFunnel checkout page?
Be sure to choose the Sell Your Product option.
You will then have to choose from what’s shown in the picture down below:

You can actually utilize a ClickFunnels checkout page with any of the options above.
However, to make things easiest:
- Choose the Sales Funnel option.
Give your sales funnel a name and then we can start building out our funnel.
Note: You don’t have to add any tags for funnel groups when giving it a name.
That’s just a section for grouping all of your funnels together, and can be edited later.
Choosing Your ClickFunnels Order Form Template
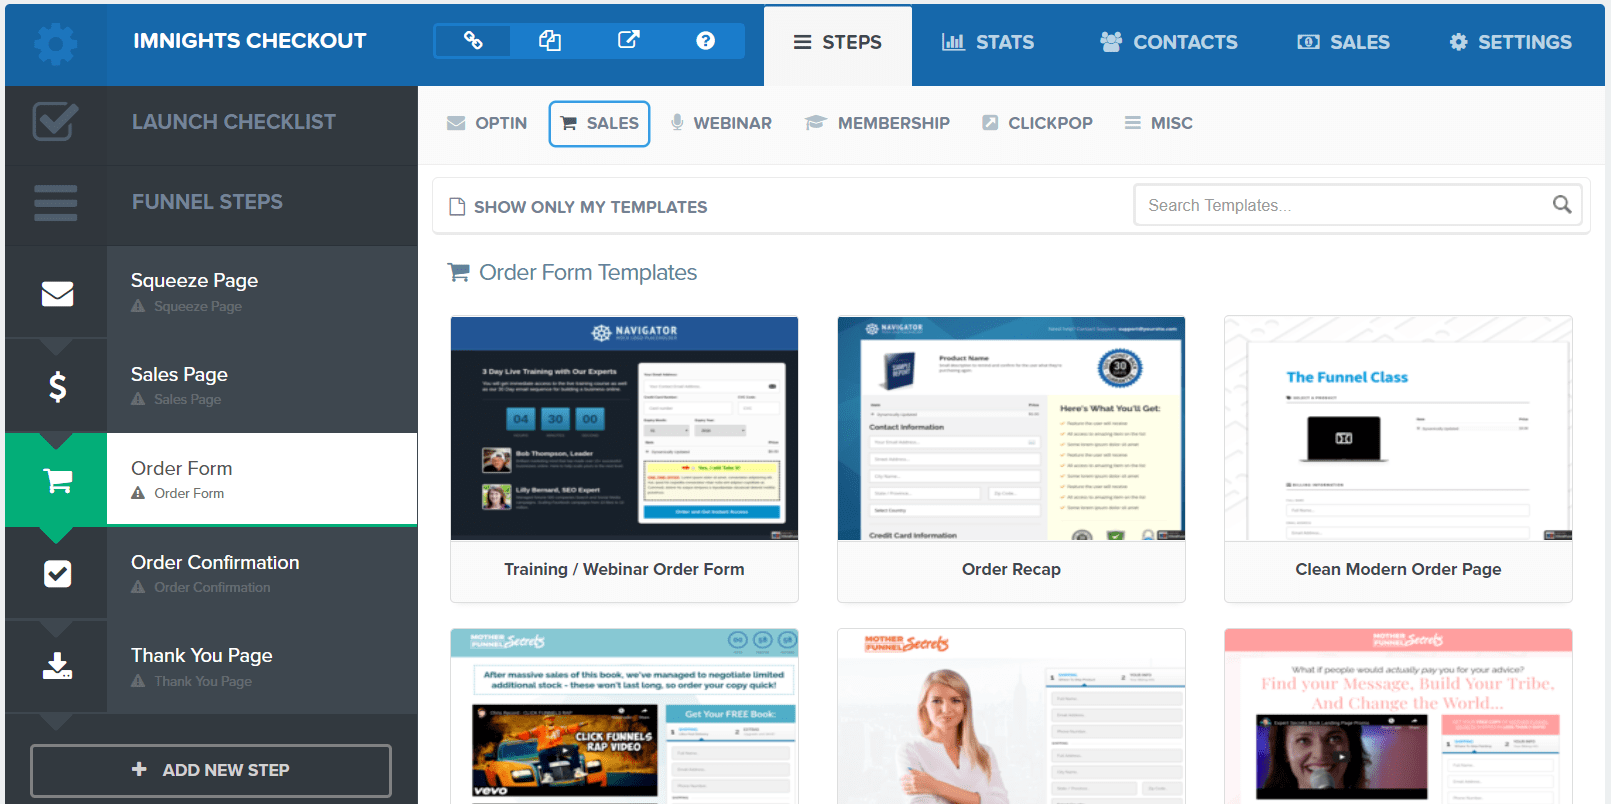
So after creating your funnel, you will land on a page that looks like the picture above.
Here are the two simple steps that you need to do:
- Click on the Order Form tab on the left side so that it’s highlighted (shown above).
- Simply pick an order form template that you’d like to use for your sales funnel.
I personally prefer the simple-looking order forms.
Here is a quick list of my favorite templates to choose from:
- Order recap.
- Skinny order form.
- Training/webinar order form.
I ended up choosing the Training/webinar order form for this specific example.
You can see what it looks like in the screenshot that I added down below:
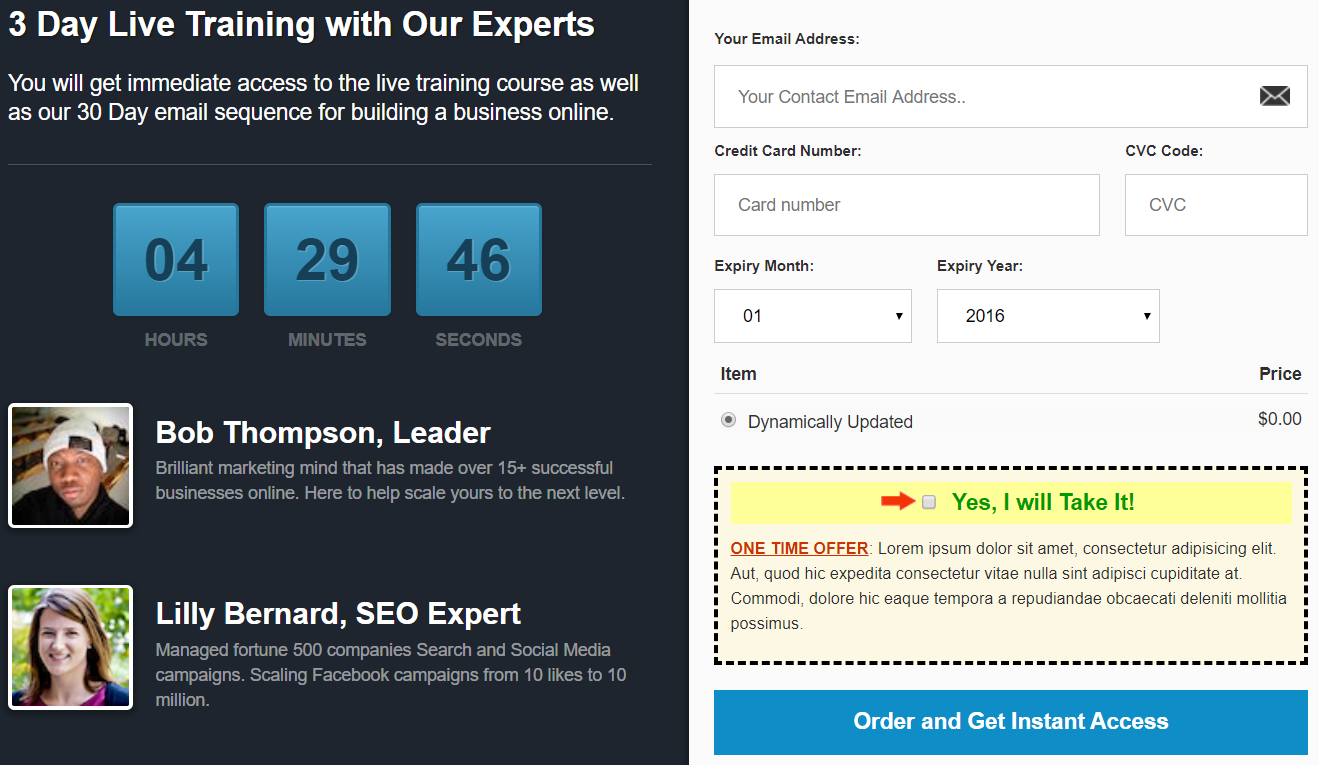
As you can see in the image above as well?
This specific template comes with the popular bump offer feature (more on that later).
So make sure that you pick and select the template that you’d like to personally use.
- You’ll then want to click on the big EDIT PAGE button.
I’ll put another screenshot down below so that you can see what I’m referring to:
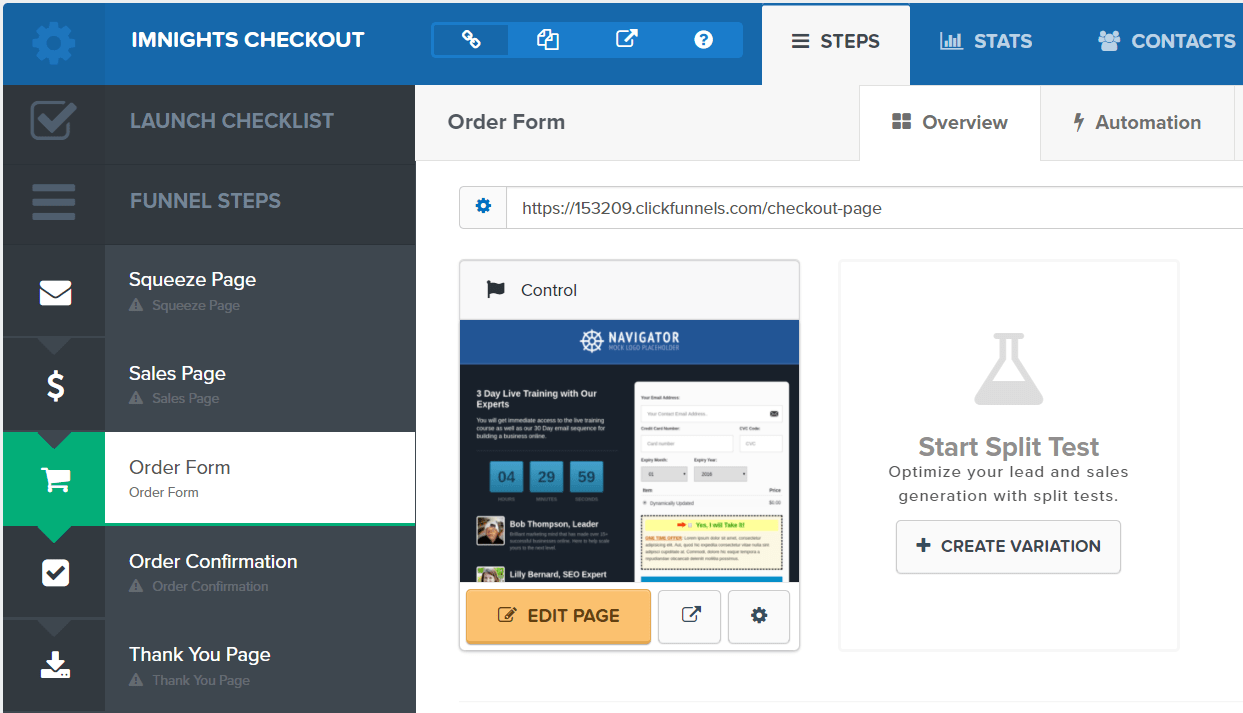
This will allow you to start personally your custom checkout page.
Let’s move onto the next step now.
This is where you’ll have to make a few tiny tweaks based upon your preferences.
Customizing The ClickFunnels Order Form Elements

So there is going to be a lot of flexibility when it comes to editing your page.
Here are the things that you are going to want to edit:
- Edit the button text.
- Edit all of the headlines and text (obviously).
- You can remove the countdown timer or change the settings.
- Add more fields for customers purchasing (name, phone, address, etc).
- You can remove the testimonials or add in ones you’ve already received.
All of these functions are easy to accomplish as well.
Especially when it comes to editing or removing something:
- To Delete: Hove over the object and click on the trash can icon.
- To Edit Text: Double click the section that you would like to edit.
Also, and in my opinion, most importantly.
Be sure to mess around with the order bump feature that is already on the page.
An order bump is an extra offer that your customers can purchase on the checkout page.
- If you don’t need it, you can simply delete it.
- If you want to edit it, simply click anywhere on it to customize it to your liking.
I did a full tutorial about this feature because it’s one of my favorites that ClickFunnels offers.
Read More: Setting up the ClickFunnels order bump.
So those are some of the main features when it comes to setting up your checkout page.
Yes, ClickFunnels even offers you the ability to create checkout pages for eCommerce products.
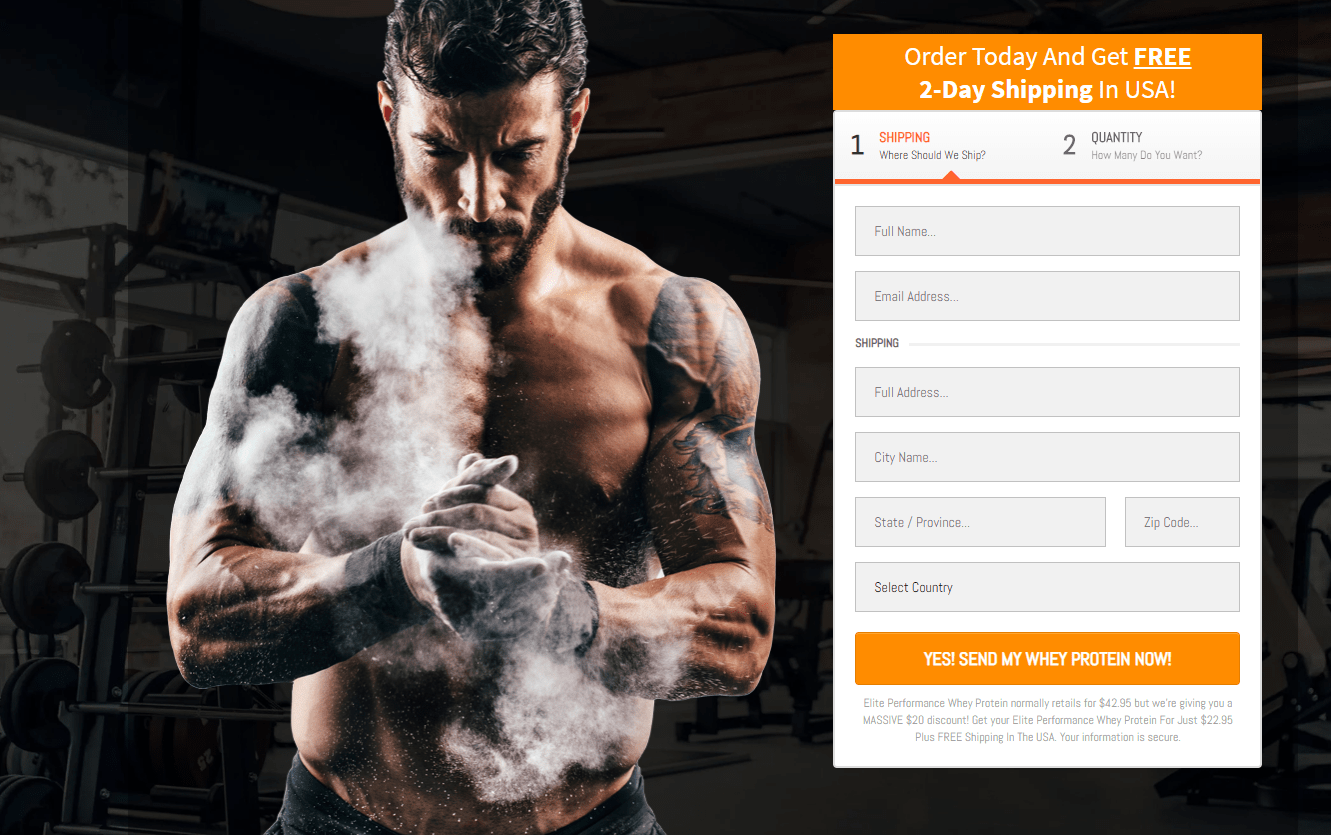
Down below is an example template for a 2-step checkout page for beauty products:
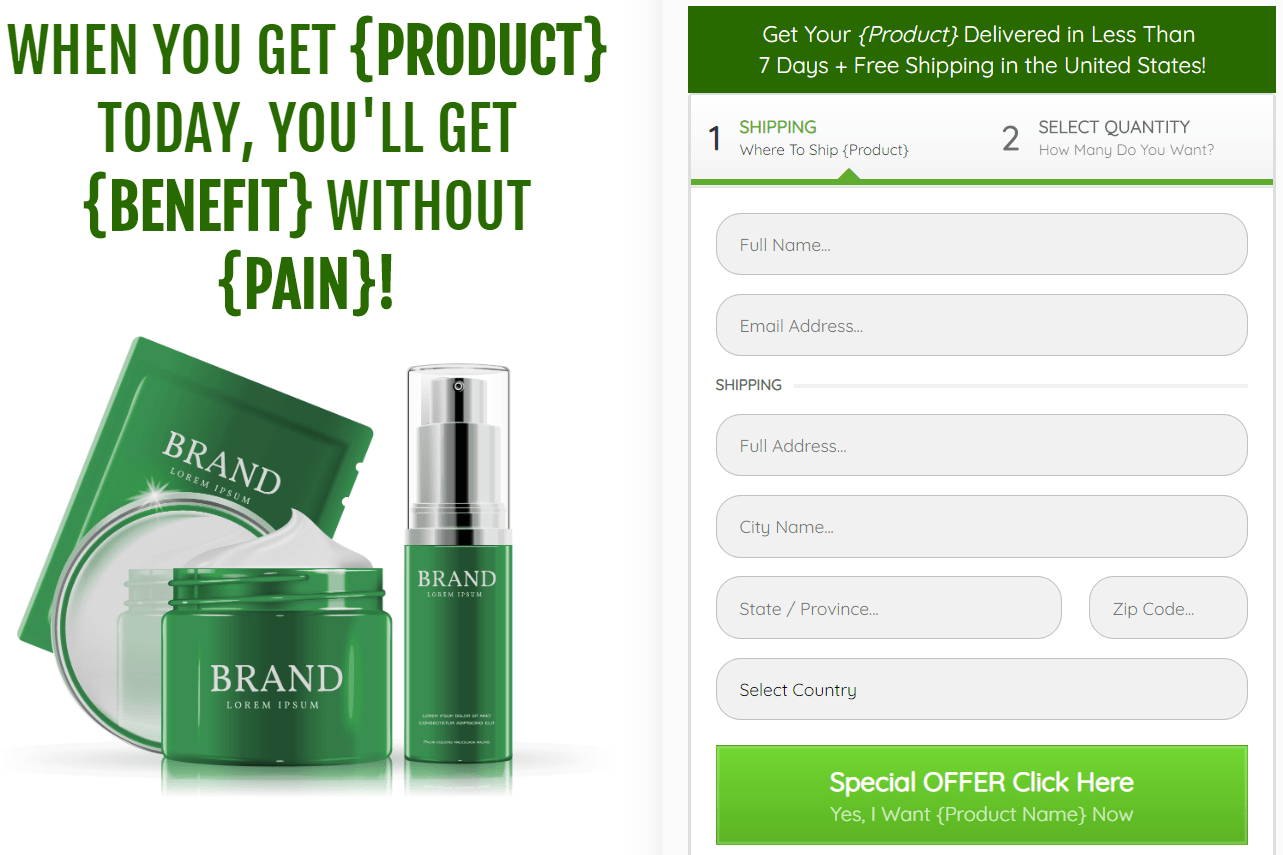
- Related Reading: Setting up a ClickFunnels eCommerce funnel.
- Related Reading: Setting up a ClickFunnels t-shirt funnel.
So that’s how you can set up your checkout page and make a few tweaks.
But how do you connect your products to the checkout page?
Let’s do that in the last step.
ClickFunnels Shopping Cart Integration & Adding Products
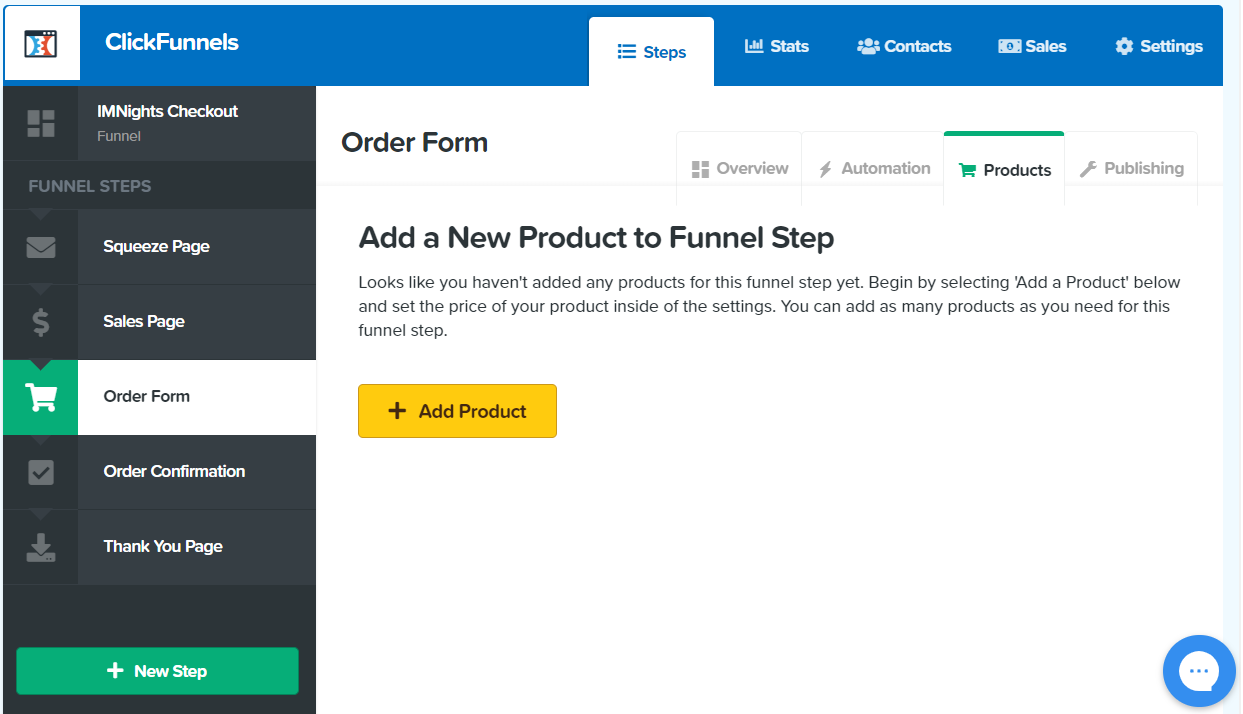
After you’ve saved your work, you’ll get taken back to the main funnel section.
- Click on the Products tab that is shown above.
- Then you will want to click on the + Add Product button as well.
This will walk you through what you need to do in order to start selling your product(s).
Note: This is going to be the main product that you’ll be selling on your checkout page.
You will need to create another product for the order bump (more on that soon).
Here is another screenshot to show you what you’ll be expecting:
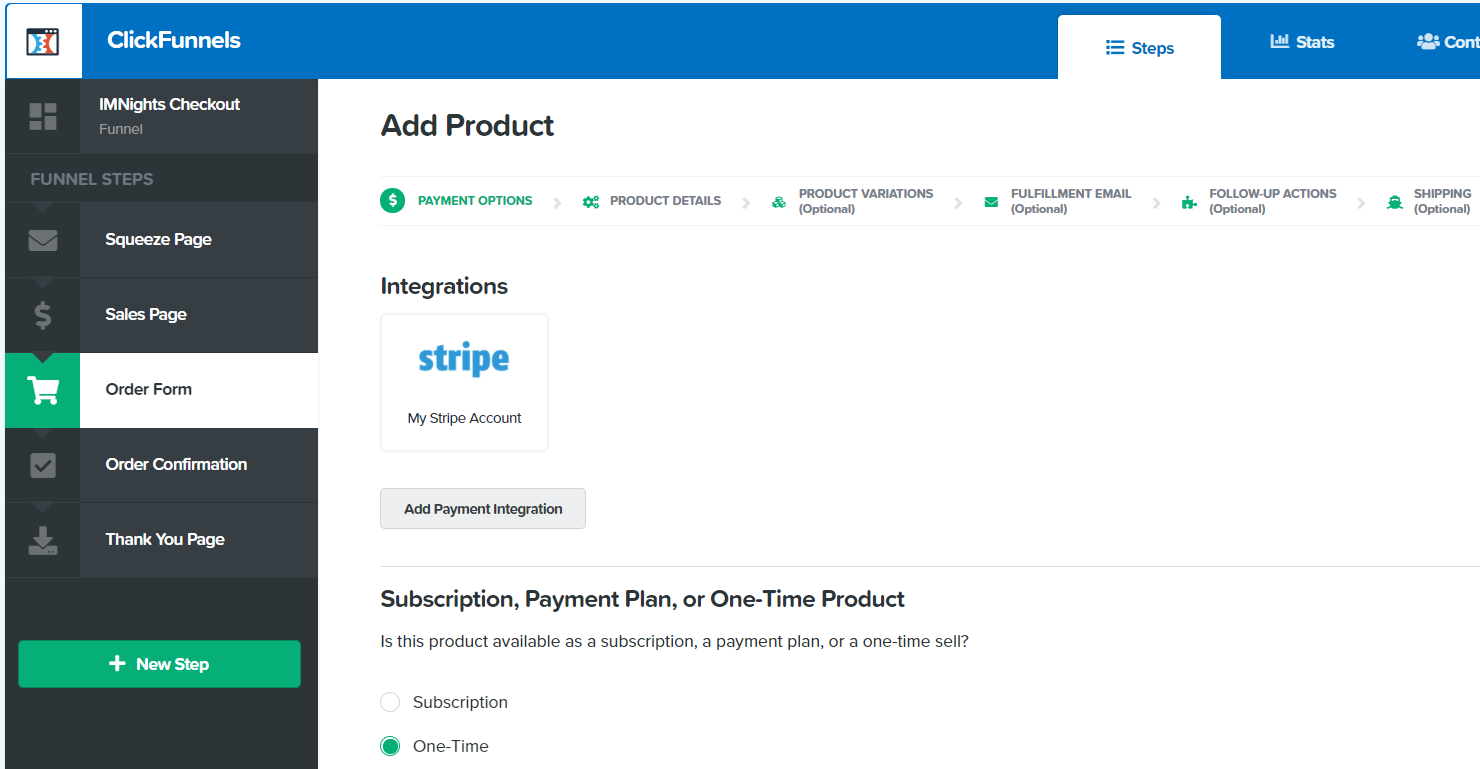
In the picture above, there are a few steps that you will be walked-through:
- Payment options.
- Product details.
- Product variations (optional).
- Fulfillment email (optional).
- Follow-up actions (optional).
- Shipping (optional).
The first section, which you can see above, is all about payment options.
I currently have Stripe setup, but you can add more payment integrations.
Helpful Note: Make sure that you actually click on the payment processor that you’ll use.
When you click on it, it will then highlight to show that it’s picked (not shown above).
Examples of a few more ClickFunnels payment integrations include:
- Stripe.
- JVZoo.
- Clickbank.
- Easy Pay Direct.
- And a few more as well.
You also have the option between choosing from one-time and subscription payments.
That option, of course, will be up to you.
Just make sure that you click on the Save and Next button after completing each step.
Everything else is self-explanatory.
Just make sure that you have a thank-you page setup for the Fulfillment Email tab.
So those are the steps that you need to follow when adding your main product.
Adding Your Offer Bump Product
Here are the quick steps that you’ll need to follow for adding your offer bump product.
- Start off by clicking on the + Add Product button again (you’ll now have 2 products).
- Everything else will be customized to the order bump.
The name, the description, the price, as well as the thank you page.
There is one thing that is going to be important with the order bump.
When you get to the Product Details section:
- Make sure that you enable the Bump Product section.
Here is a quick screenshot of where you’ll be able to see that specific section:
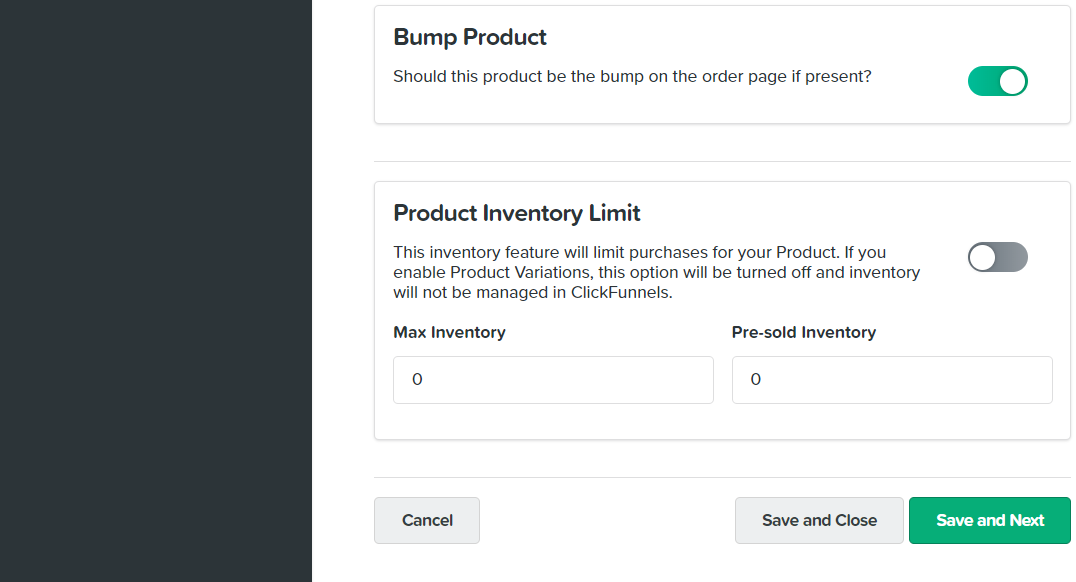
That’s what will allow you to add your product to the order bump section.
Keep in mind that if you aren’t currently selling an offer in the order bump section?
Then there is no need to toggle this on.
So that is a pretty quick tutorial when it comes to using a shopping cart with this software.
Let’s move to the end now so that I can wrap things up and answer a few more questions.
ClickFunnels Shopping Cart Summary And Conclusion
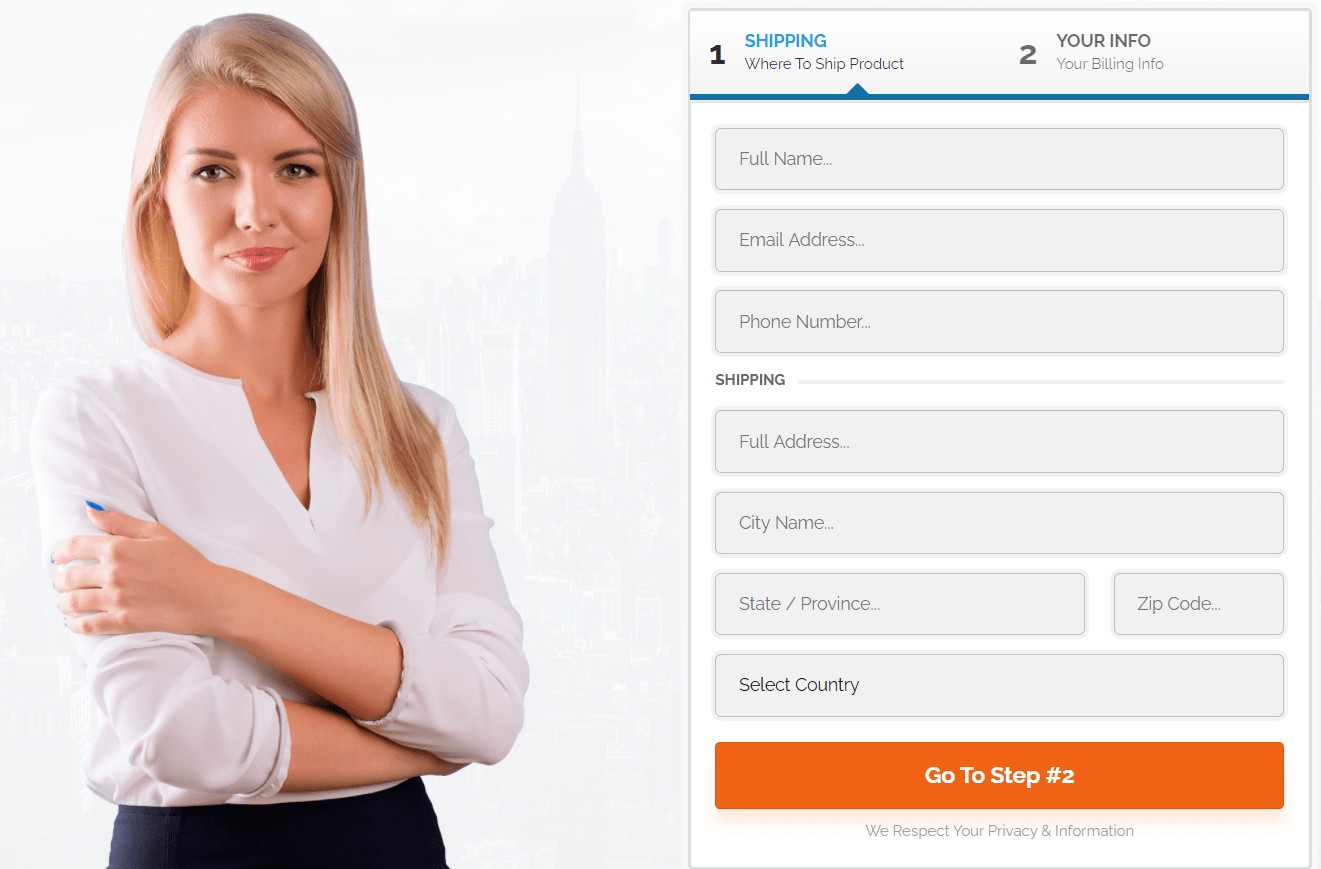
The ClickFunnels shopping cart allows you to sell any of your products, offers, or services. You can add two total products thanks to the helpful order bump feature as well.
So that was a quick tutorial when it comes to setting up your order form/checkout page.
It’s very helpful that this sales funnel software comes along with its very own shopping cart.
Note: You can get the shopping cart feature with both of the ClickFunnels plans.
- So if you currently use ClickFunnels?
- Or you haven’t gotten started using ClickFunnels yet?
I’ll leave a related post down below about how to save a good amount of money using this tool.
And yes, it works for current customers and non-customers too.
I’ll leave that link for you down below.
Related Reading: The little-known ClickFunnels discount.
And one more section for you.
Shopping Cart Frequently Asked Questions
You might have a few more questions when it comes to this specific topic.
So allow me to answer as many of those as possible for you.
Is ClickFunnels A Shopping Cart?
This question is hard to answer based on the way it is asked.
ClickFunnels is many things.
However, they do come along with a shopping cart as you’ve seen in this tutorial post.
How Many Products Can Be On A ClickFunnels Order Form?
You are allowed one product on your main order form, however, there can be many variations.
Thanks to the offer bump feature, that will allow you to have an extra product.
Note: There are other ways around this, especially when selling multiple products.
About the Author James Canzanella
A former personal trainer who went from unemployment to online business success. He's been marketing since 2012 and (still) enjoys lifting weights, listening to rock music, and relentlessly quoting movie lines.
