
ClickFunnels Upload: Photos, Videos, & Files Tutorial
Welcome to the ultimate ClickFunnels upload tutorial.
In this post you will quickly learn:
- How to upload a video to ClickFunnels.
- How to upload photos to ClickFunnels.
- As well as any other types of files.
Just make sure that you read until the end.
As there’s an even more helpful tutorial waiting just for you.
Let’s begin.
ClickFunnels Upload Tutorial: First Step
First things first.
I imagine that you already have a ClickFunnels account so you will need to log in.
If you are already logged in, it will take you to your main dashboard.
All you need to is pick the funnel where you’d like to add your upload.
Now onto each specific section.
How To Upload Multiple Images To ClickFunnels
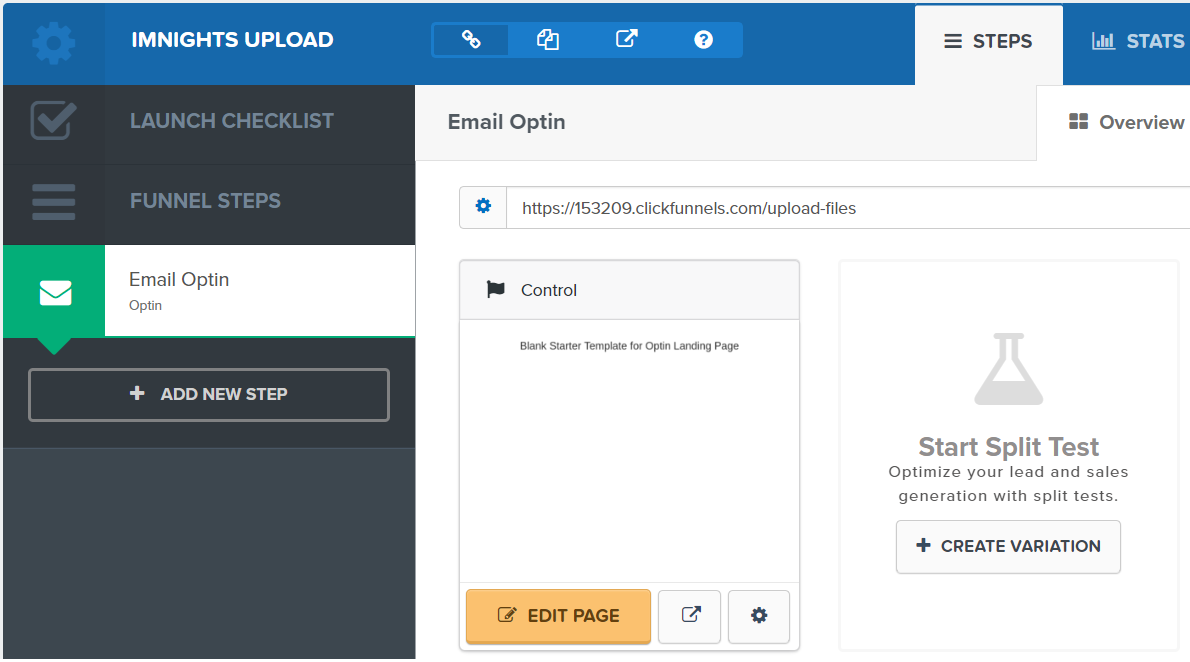
So for this example, I made a dummy funnel so that you can follow along.
- Click on the EDIT PAGE button where you’d like to add your file.
You will then get taken to the ClickFunnels editor where you can add your images.
Here are the steps:
- Hover over a section in the middle until an orange box goes around it.
- Hover over the + icon and it should say ADD NEW ELEMENT (click on it).
Here is a quick picture of what that would look like:
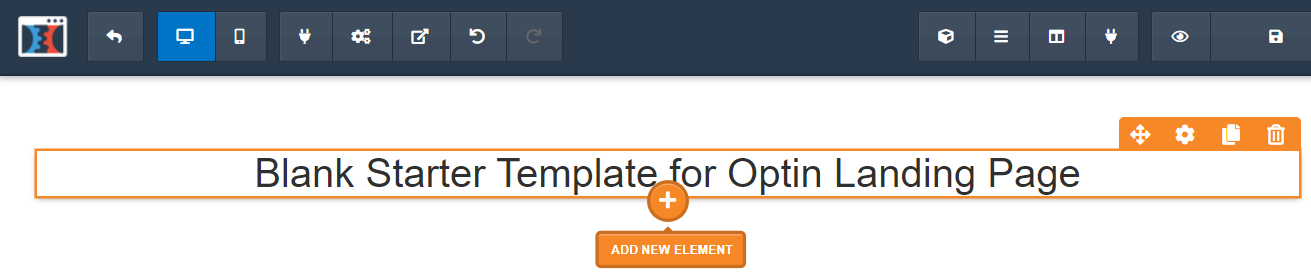
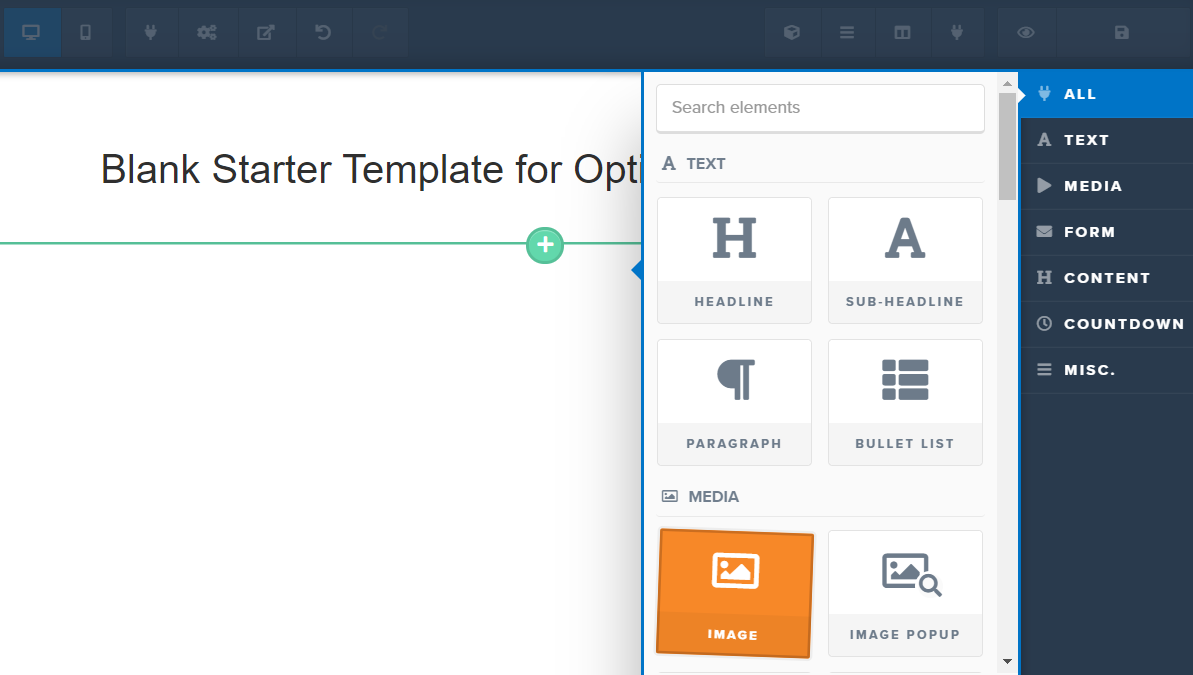
A screen will then show up on the right side of the page with elements to choose from.
Some of the elements include:
- Bullet-lists.
- Headlines and paragraphs.
- Image and image pop-ups.
- And don’t forget about video and video pop-ups.
For this example, click on the Image icon which you can see in the image below:
A grey box that says Demo Image will then show up in that specific spot:
- Click on the Demo Image box in the middle of the page.
You will get another section that comes out to the right side of the page.
It has:
- The image URL.
- The alt text of the image.
- As well as a few more things such as dimensions and link URL.
You’re going to want to click on the square icon to the right of the IMAGE and URL.
I’ll put another picture down below where the icon is highlighted:

So if you look at the picture above:
- You will want to click on the little icon that is highlighted in orange.
That will then take you to the main Uploaded Images section (home free)!
Here is what that section looks like:
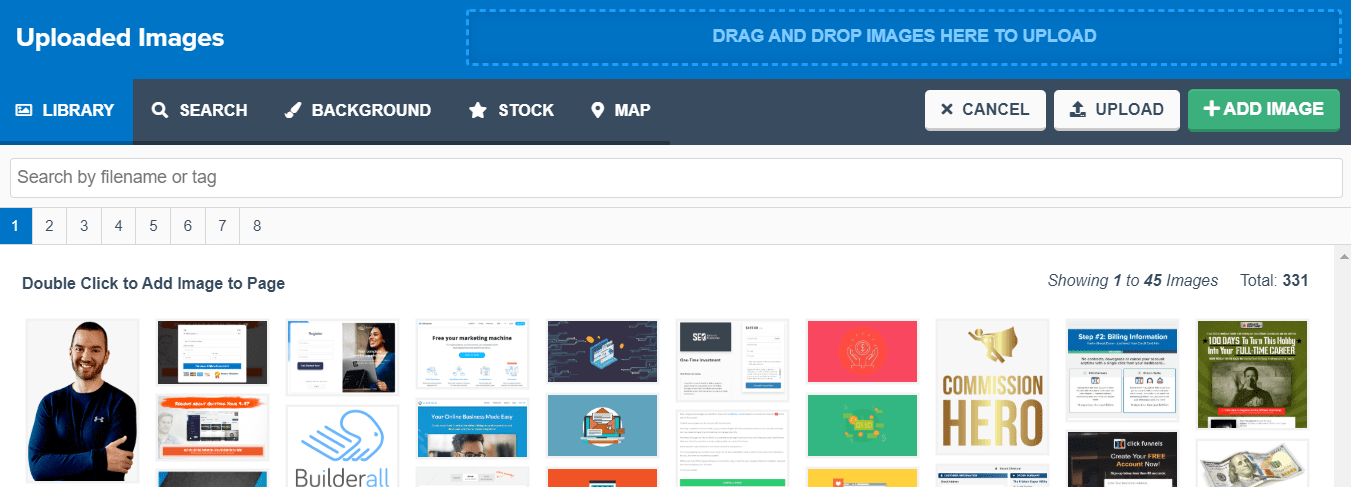
Now it’s a very easy process when it comes to uploading a photo:
- Click on the UPLOAD button on the top right (or drag and drop your image).
- Find the file on your computer and click on open (it will then be added).
Here is how to add that photo to your actual landing page.
- Double click the image (or).
- Click on the image once so that it’s highlighted and click + ADD IMAGE.
It’s about as easy as it gets.
Here is a video tutorial in case you’d like to follow along with that way as well:
I know that you might have a few more questions about this topic.
So here is a little more information when it comes to images and pictures with ClickFunnels.
How To Delete An Image From ClickFunnels
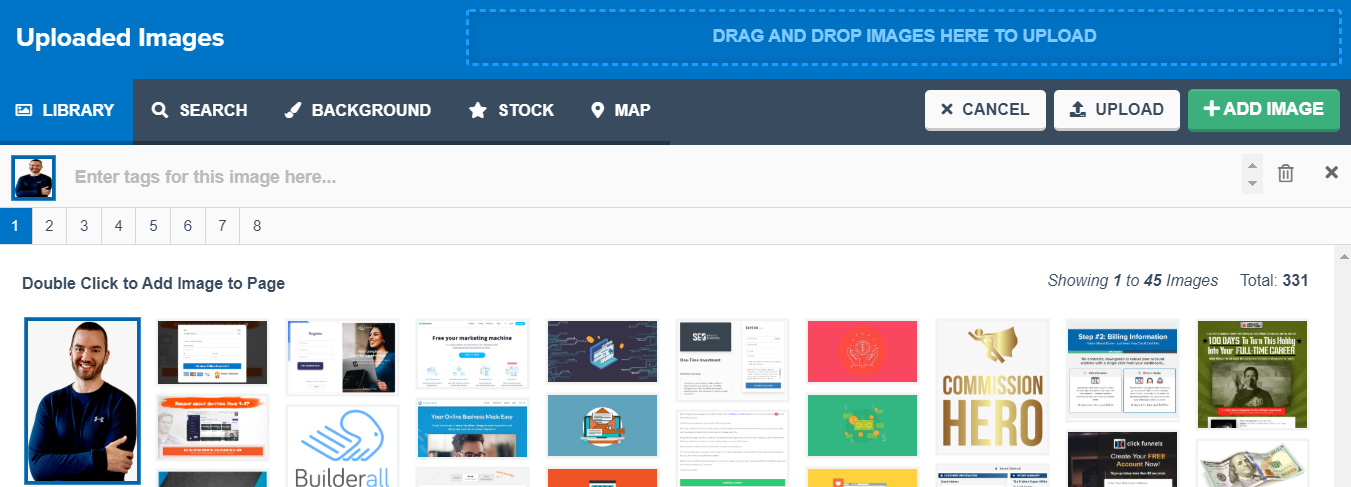
This one is easy.
- Click on the image that you want to delete.
- Click on the trash can icon that is on the right side of the screen.
As I said, it’s very easy (especially when you know how to do it now).
Here is one more question answered when it comes to this specific topic.
How To Upload A Background Image In ClickFunnels
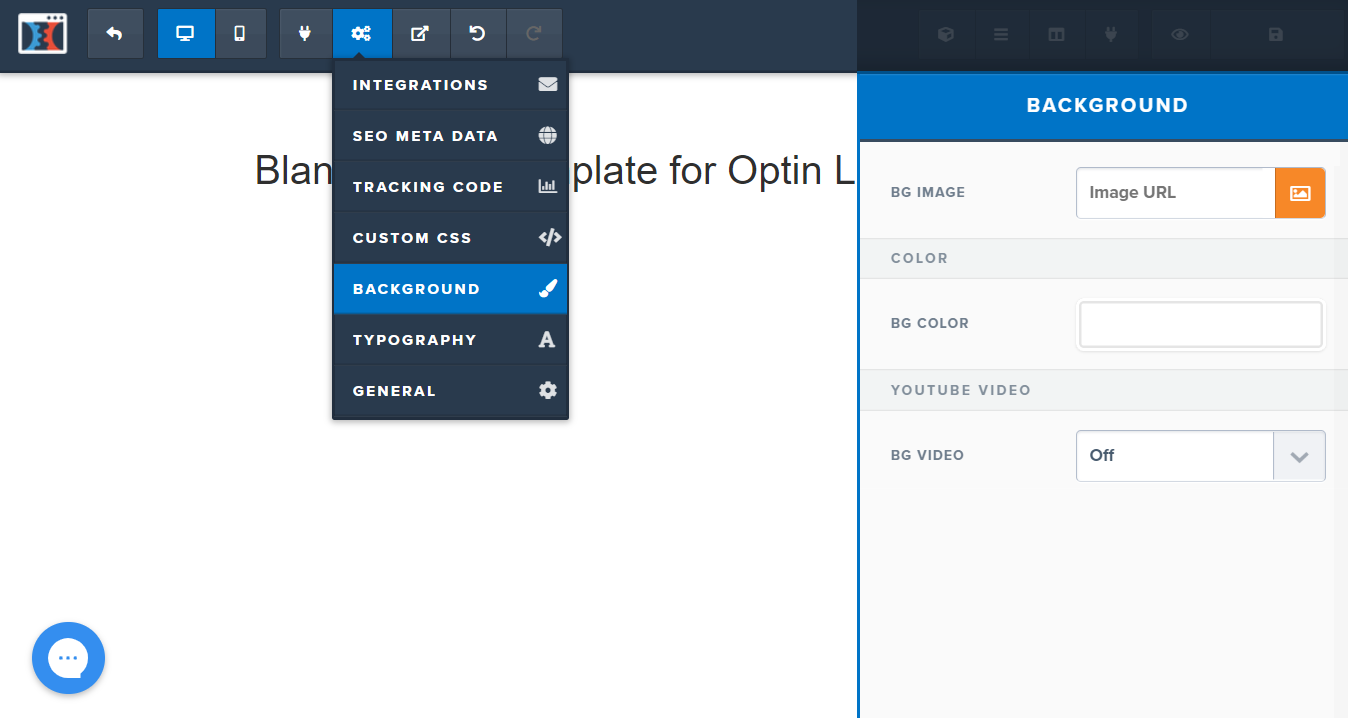
This will be done the same way that I’ve talked about for previous images.
I just need to show you how to access the background image area (shown above).
Please follow along with the screenshot above for instructions:
- Hover over the Settings tab and click on Background.
- You will see a section on the right show up where you can add in your image.
And just like that, you have added in your background image 🙂
But what about videos?
That’s next.
How To Upload Videos To ClickFunnels
This is going to be much easier considering the fact you know most of the steps.
Just like we did previously with images, you want to start at the main editor section:
- Hover over a section in the middle until an orange box goes around it.
- Hover over the + icon and it should say ADD NEW ELEMENT (click on it).
A screen will show up on the right side again.
This time, you are going to want to click on the
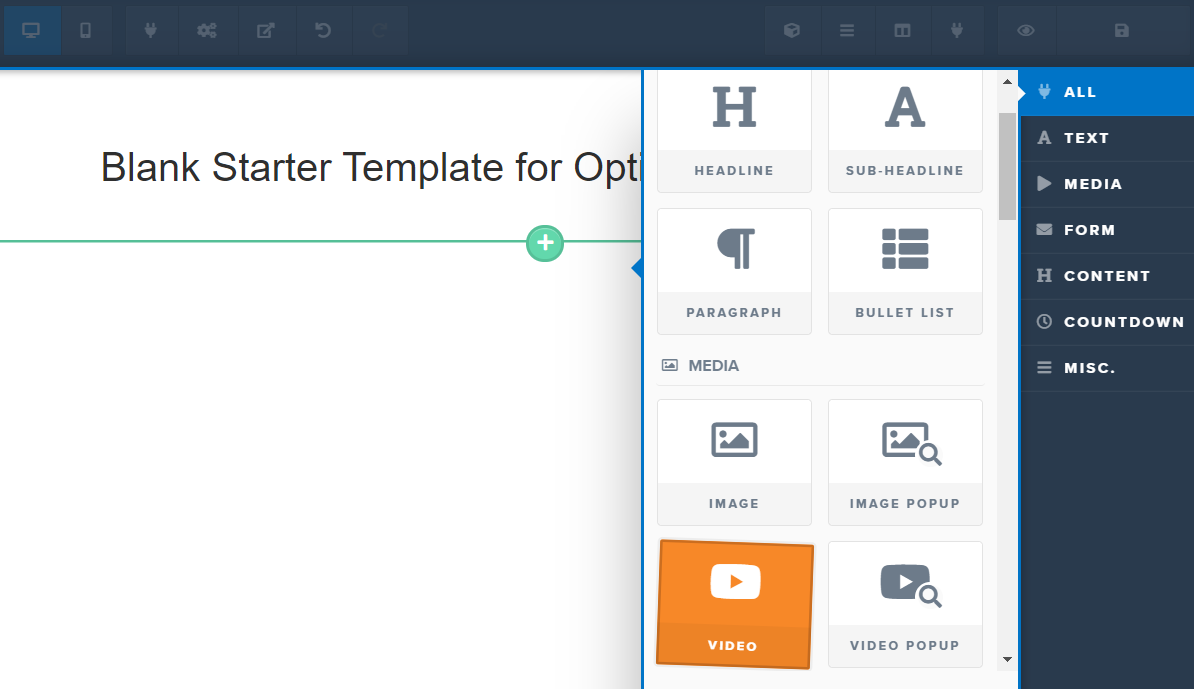
You will then have a very big video placeholder in the middle of your screen.
- Click on the video placeholder in the middle.
On the right side will be a section where you can add your specific video.
Click on the Video Type section and it could be from:
- Wistia.
- Vimeo.
- YouTube.
- Easy Video Suite.
- Or any type of custom embed.
For this example, I am going to pick YouTube because it’s the easiest:
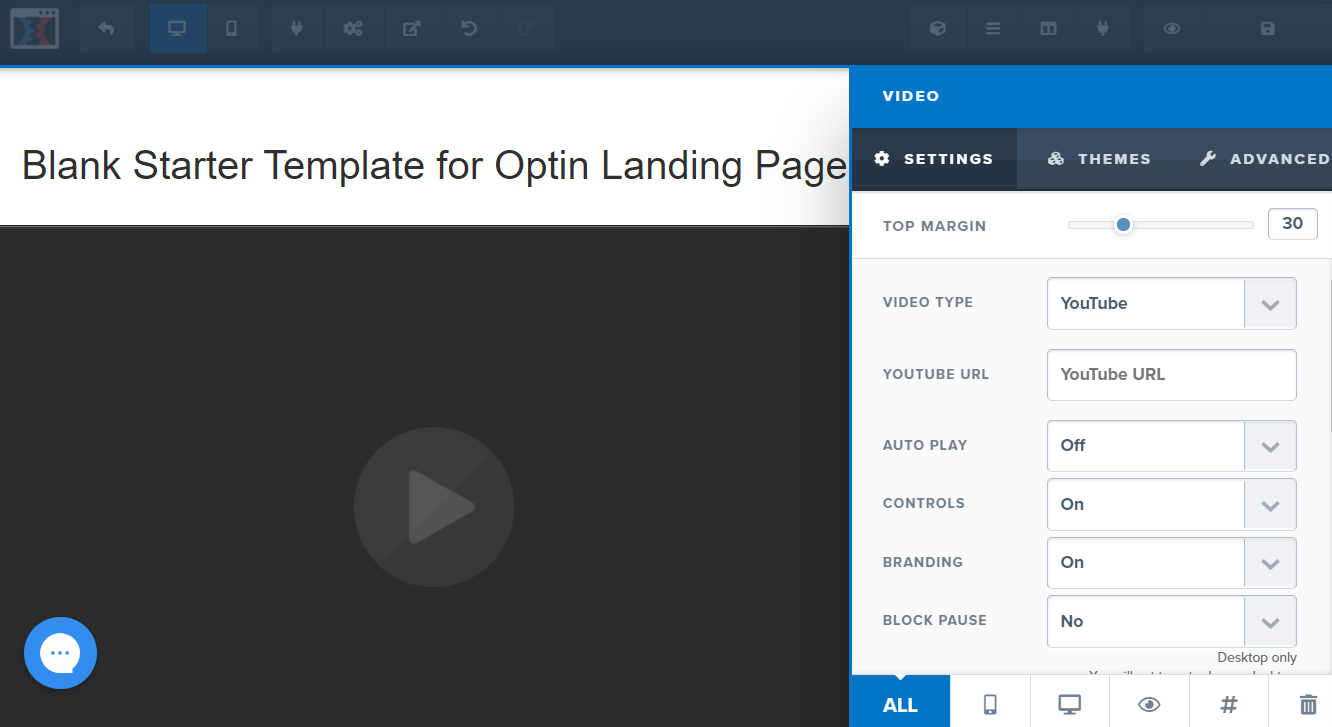
So if you want to add a YouTube video?
- Just add the YouTube URL into the YouTube URL section.
You can also make specific changes to your video which includes:
- Autoplay.
- Controls and branding.
- As well as the ability to block pause.
If you want to edit the size of your YouTube video and how much space it takes up?
- Click on the Advanced tab on the top right of the screen (shown in the picture above).
Important Note: Keep in mind that ClickFunnels doesn’t host the videos themselves.
You have your videos hosted elsewhere and are simply embedding them to the platform.
Here is one more question answered related to this topic.
How Do You Upload Videos To The Membership Area In ClickFunnels?
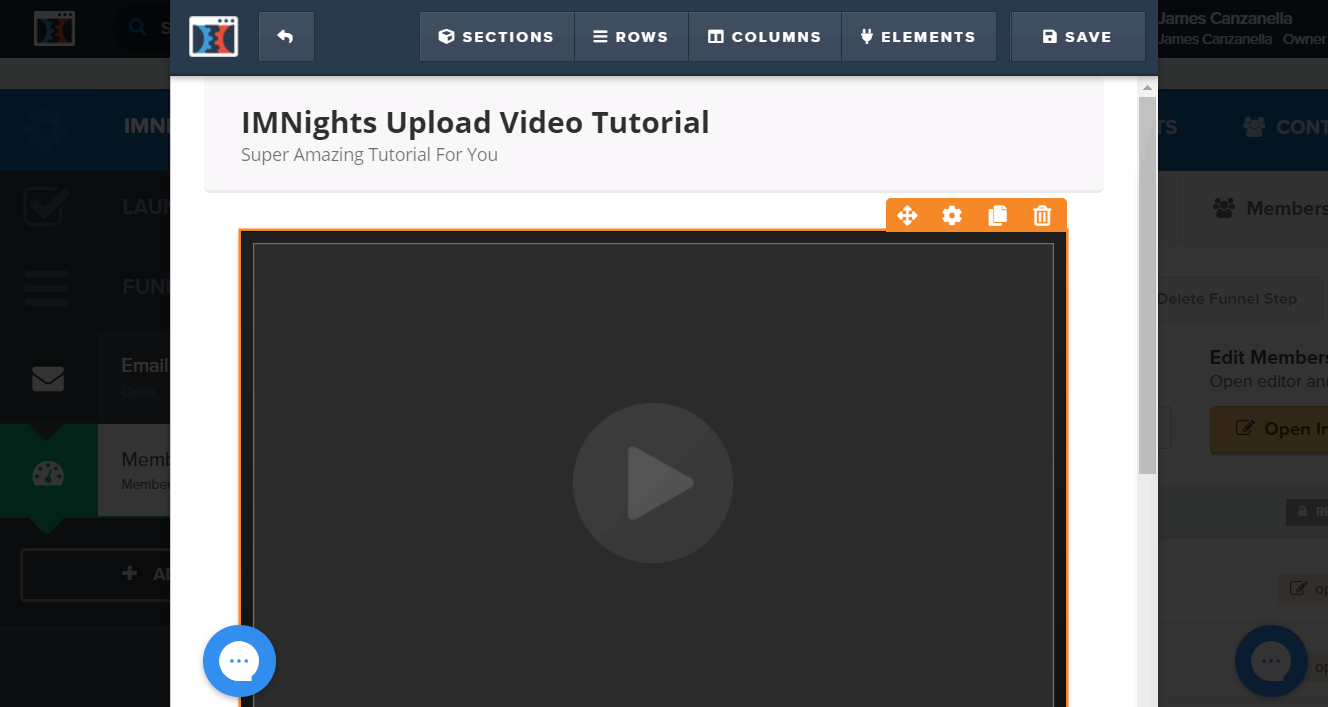
This is done the same way.
Simply click on the video placeholder and you’ll have your video options show up.
From there, you can add in your video depending on where it’s hosted.
So I hope that helped you when it comes to uploading videos.
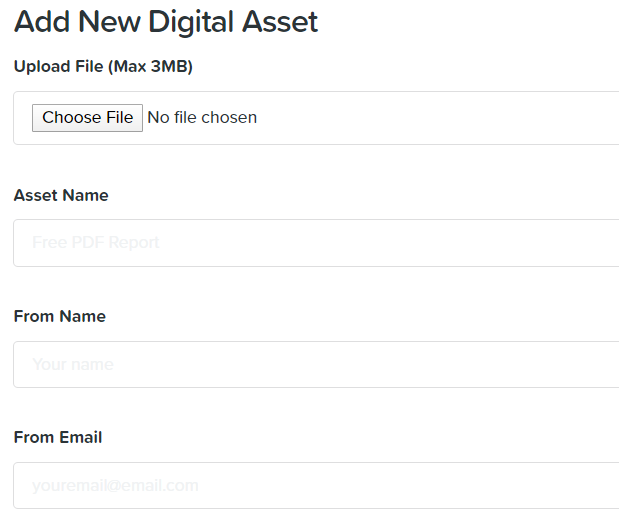
What About Digital Assets?
Given the fact that this is related to adding files to ClickFunnels.
It makes sense that I at least bring up this topic (in case you need help with it).
Nevertheless.
Let’s move onto the end of the post now.
ClickFunnels Files Tutorial: Conclusion
I hope that this article helped you when it comes to getting your files on ClickFunnels.
As I stated in the beginning?
I have another helpful post that can help you save money using ClickFunnels.
And yes.
It works for both:
- Current ClickFunnels customers (like you).
- As well as those who are looking to get started using this software.
I’ll leave you to that.
Related Post: ClickFunnels PDF tutorial.
About the Author James Canzanella
A former personal trainer who went from unemployment to online business success. He's been marketing since 2012 and (still) enjoys lifting weights, listening to rock music, and relentlessly quoting movie lines.
