Unbounce Review: Is This Software Worth It?
This Unbounce review is going to be all about high-converting landing pages.
After all, this is what Unbounce was made for.
- The ability to create custom landing pages that convert more visitors than any website.
But does Unbounce live up to all of its landing page popularity and buzz?
Be sure to keep reading on to find out.
What Will You Discover In This Unbounce Review?
The ultimate goal of this Unbounce review is to make it seem liked you’ve already used this tool.
- You’ll know how to create landing pages.
- You’ll also understand the features that come along with this landing page builder.
And because of that?
It will allow you to properly assess if this will be the best landing page builder for you.
In fact.
You can follow along with me with your free trial and discount below:
Let’s begin with one of the most important (and obvious) features of this landing page builder.
Unbounce Landing Pages Like Lightning

So this is the dashboard that you’ll see once you get started using Unbounce.
- You can watch the two-minute demo video (and/or).
- Start with the creation process (especially of a new landing page).
On the top right of the screen will be a Create New button.
Note: You can’t see it in the picture above, but don’t worry, it’s still there!
After that, you immediately get a taste of the terrific templates that comes with Unbounce.
Here is a super simple screenshot to give you an example (I just love alliterations):
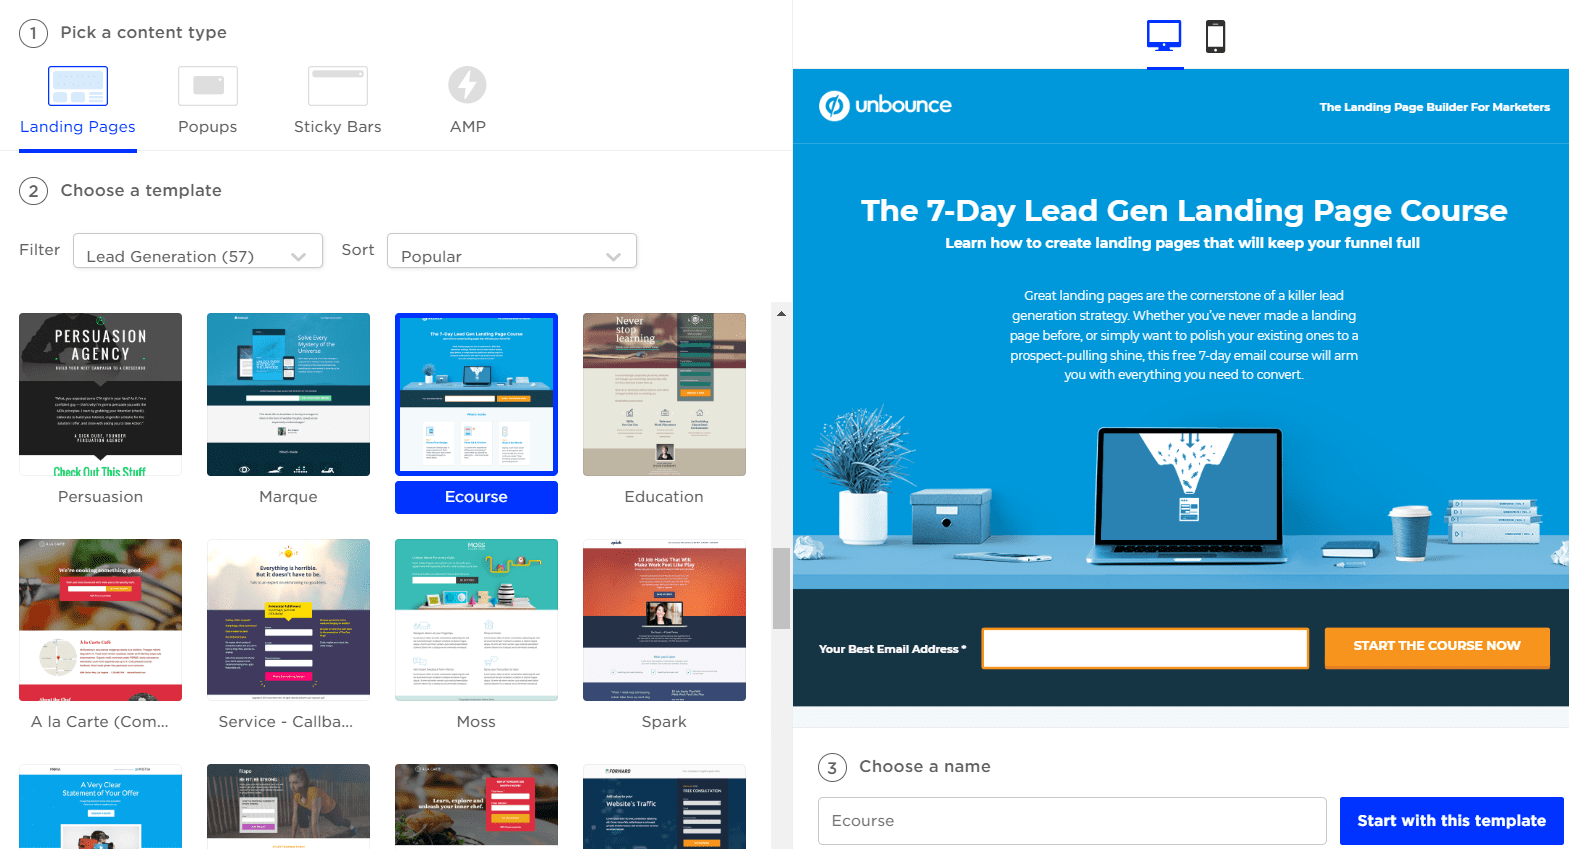
Above are just a few of the lead generation Unbounce templates.
There are plenty of other filters that you can sort through as well which include:
- Click-through landing pages.
- Industry-specific landing pages like fitness, real estate, online marketing, etc.
And many more.
You can also sort by Name, Popular, or the most recent landing pages.
All In All: Finding and picking an Unbounce template is a pretty quick process.
Here is the template that I’m going to use for this specific review example:
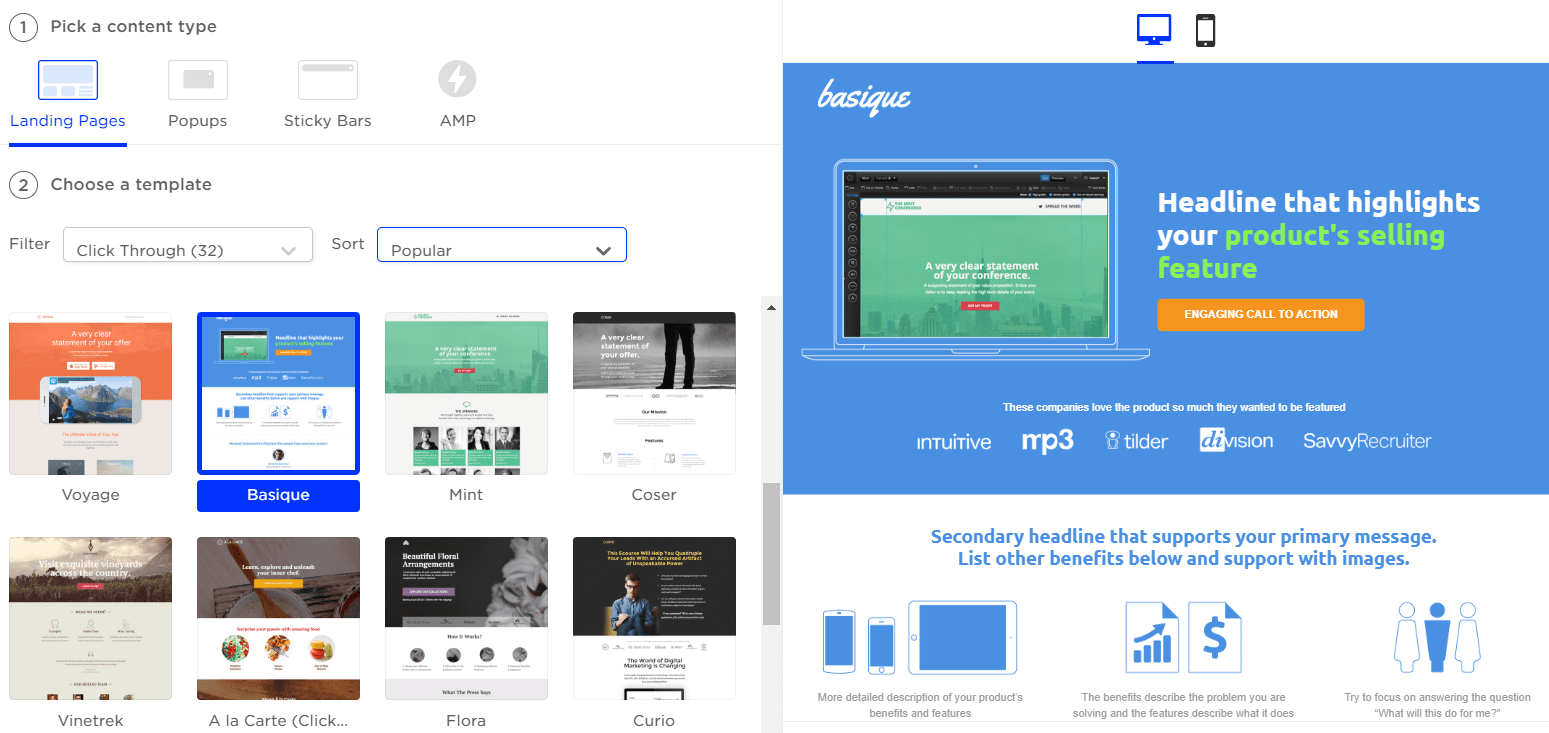
After clicking on the template (Basique), you then just give it a name.
Here is the name that I created this time around for this dominant landing page:
The Most Super Awesome Landing Page Ever
A little cheesy, but hey, I do what I can 🙂
Now we move onto the biggest part of creating your landing page: the editor.

On the left side of the screenshot you have many of your important actions:
- Box.
- Text.
- Image.
- Section.
- Embed video.
I think you get the idea.
What I think you’ll like the best about their editor is their overall simplicity.
I’ve tested many landing page editors where they are clunk and harder to pilot.
Unbounce isn’t like this.
- You simply click on the appropriate icon on the left side.
- It will then tell you: click + hold to drag onto page.
- You can then drag it anywhere you want and edit it.
As you long as understand those three steps above and how they work?
Then you’ll have no problem with the Unbounce editor.
Plus, there’s also the Undo button at the top of the page which is very helpful.
The top of the page also features basic functions like Copy, Paste, Duplicate, and Delete.
You know, just in case you were wondering where they were (as you’ll be needing those).
But what about changing an image, or maybe even a button with a call to action?
That’s even easier and I will show you right now.
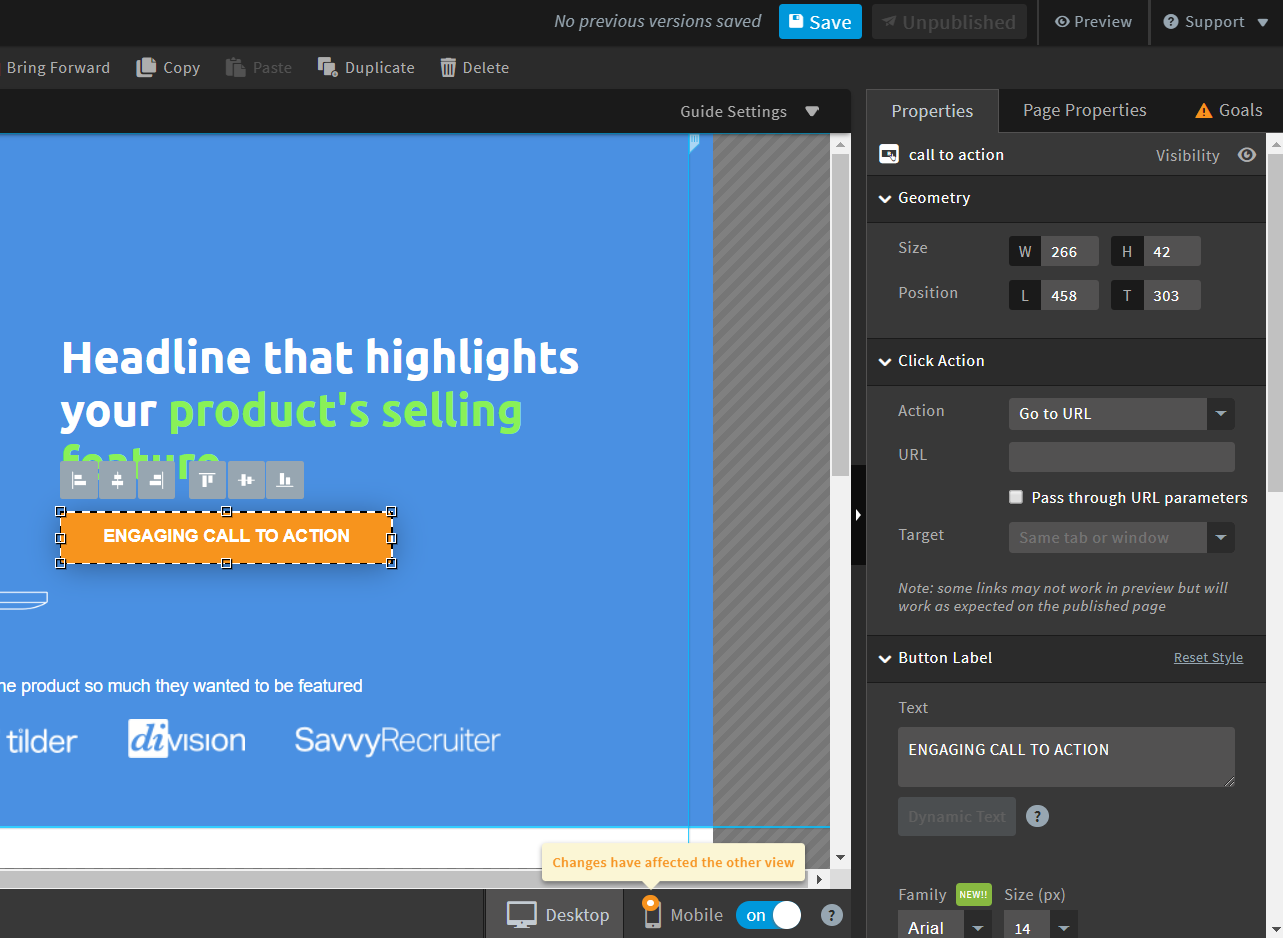
Here are the steps when it comes to editing a button, text, or an image:
- Click on what you want to edit (in this case is the CTA button).
- Look to the right of the screen and add in your go-to URL.
You can also edit your test in the Button Label section in the Text box.
So while everything might seem like it’s currently all sunshine and skittles?
Keep in mind that you will have to also edit your mobile page with the proper edits.
If you look at the bottom of the screenshot (above), it states:
Changes have affected the other view.
This is just minor criticism given the fact that most landing page builders operate this way.
Overall?
Here is what you’ll most likely find when it comes to creating landing pages with Unbounce:
It’s a quick and simple process.
I guess you can say I’m a man of a few words when it comes to big epic moments.
You don’t have to take my word for it though as you can always try it for free yourself:
Let’s now take a look at another big feature that’s helpful when it comes to higher conversions.
Unbounce A/B Test

Also referred to as split testing.
This is the ability to test two (or more) landing pages simultaneously to get the best conversions.
Here is what I did to get this simple split test ready to be run:
- Click on the A/B Test box (it’s highlighted in blue above).
- Duplicate the First Variant landing page and then make one big edit.
- Set the weight of the traffic to 50% for each of the landing pages in the split test.
Pro Tip 1: Only make once change to the landing page that you duplicate.
Pro Tip 2: Make sure you send a significant amount of traffic before picking a winner.
The image above showcases the steps that I took to get to the end of the split test process.
Here’s another fantastic feature that comes along with Unbounce.
Unbounce Popups For More Conversions

Popups are simply little boxes that show up on your page at a specific time.
Popups can be added to both:
- Your website (and/or).
- Your landing page.
There’s a total of 42 Unbounce popup templates to choose from (a good amount).
Similar to a landing page, you pick your template, give it a name, and then begin editing.
Let’s do that right now as well.
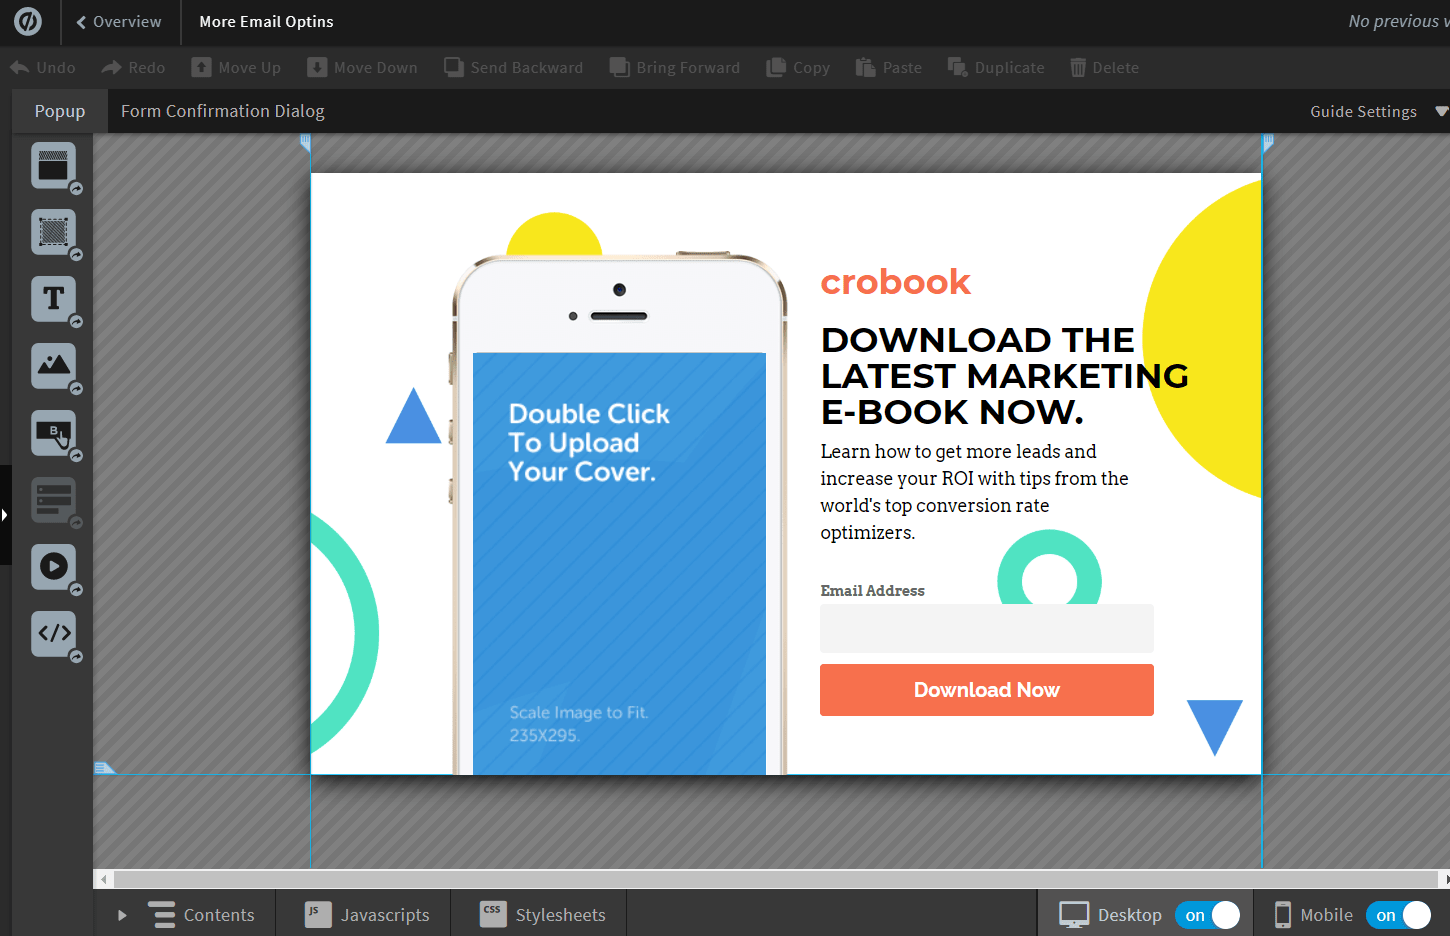
You’ll be glad to know that popups use the same editor as landing pages.
Do you remember the three simple steps that I mentioned previously?
- Simply click on the appropriate icon on the left side.
- It will then tell you: click + hold to drag onto page.
- You can then drag that section anywhere you want and edit it.
So there’s not much more to explain here as I did that with the landing pages section.
However, multiple triggers will determine when your popup shows:
- When a visitor scrolls up the page.
- When a visitor arrives on your page.
- Even when a visitor tries to exit the page (doesn’t work on touch screen devices).
There’s also triggers that you can set based upon time or a percentage like:
- After a delay of X seconds.
- When a visitor scrolls X percent of the way down the page.
You can also edit the frequency such as:
- Don’t show on the first visit, show on all return visits.
- Show once per visitor.
- Show on every visit.
And a couple more based upon a specific visit number, or every X visits.
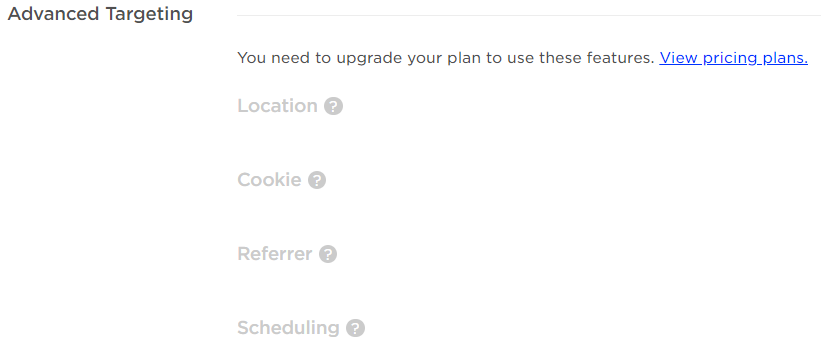
There’s also advanced targeting but I didn’t get to test those seeing I didn’t get Premium:
All in all, this is a solid feature that comes along with the ability to creating landing pages.
- It’s also simple to use (because you use the same editor).
- And it’s a proven way to get more clicks, sales, or even email subscribers.
Curious to see how this feature works on your website?
Let’s move onto one more similar Unbounce feature that will help with your conversions.
Unbounce Sticky Bars For Even More Conversions

Sticky bars are exactly as they sound:
- They are long sticky bars.
- They hang around at the top or bottom of your pages.
Sticky bars are a great non-intrusive way for increasing your conversions.
In fact.
They are better on mobile because they stick out even more (like a sore thumb).
Also, creating sticky bars is done the same way as creating landing pages and popups.
So I’m going to skip the tutorial about how to go about doing that.
Helpful Note: Just remember the three simple steps for creating anything in Unbounce.
Sticky bars also come with the same settings as popups when it comes to:
- Triggers.
- Frequency.
- Advanced targeting.
Unbounce doubled down on the process of using their drag and drop editor.
And in my opinion, it works very well for the features that I’ve showcased in this review.
Further Reading: Unbounce sticky bars tutorial.
So those are some of the most popular features that come along with Unbounce.
There are many more, but I want to answer one of the biggest questions for this software.
What’s The Investment For Unbounce Going To Be?
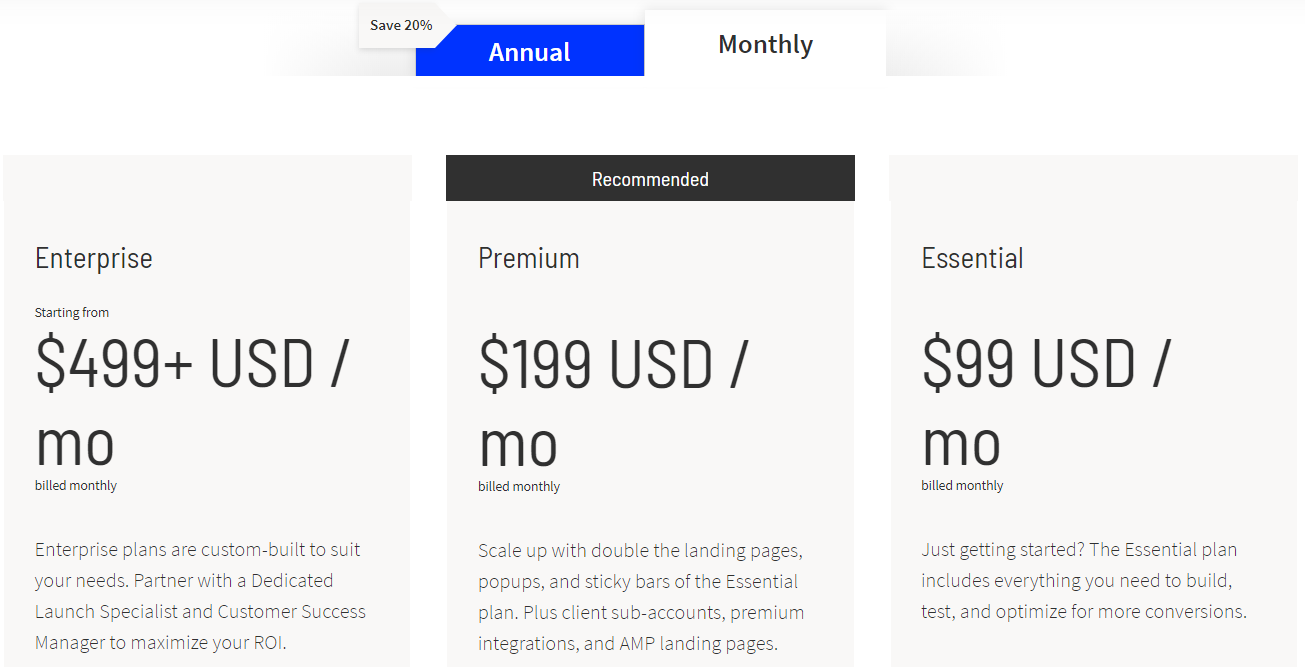
So when it comes to Unbounce, there are 3 total plans and 2 ways to pay.
Let’s start with paying once per month.
Monthly Investment
- The Essential plan is $99 per month.
- The Premium plan is $199 per month.
- Lastly, you have the Enterprise plan which is $499+ per month.
That’s what you can expect if you ended up paying monthly.
Here are some of the important perks that come along with the Essential plan:
- 75 landing pages.
- Unlimited domains.
- 8 popups and sticky bars.
- Dynamic text replacement.
- Monthly traffic limit of 500,000 visitors.
And here are some of the important perks that come along with the Premium plan:
- 150 landing pages.
- Launch scheduling.
- Unlimited domains.
- Many more integrations.
- 16 popups and sticky bars.
- Dynamic text replacement.
- Monthly traffic limit of 500,000 visitors.
And a bunch more.
I did a post about the complete pricing plans and perks if you want more info.
Highly Related: Click here for the Unbounce pricing post.
You’ll also be able to see the Enterprise perks as well.
Now let’s look at what it comes down to if you pay once every year.
Annual Investment (Plus Bigger Savings)
- The Essential plan now comes out to $79 per month.
- The Premium plan now comes out to $159 per month.
- And the Enterprise plan now comes out to $399+ per month.
So you’re looking at a nice 20% savings when you go with the annual payment.
Plus, I have another way for you to even save more when it comes to this software.
I highly recommend that you check out the article below as well.
Highly Recommend Post: Don’t use Unbounce without getting this discount.
So now you quite a lot about Unbounce:
- Their features.
- What the investment is (and even how to save money).
- A walkthrough of using their editor for landing pages, popups, and sticky bars.
With all of that being covered?
Let’s move onto the conclusion of this review blog post.
Unbounce Review Conclusion: Is It Worth It?
So allow me to answer the important question first:
Is Unbounce worth it?
I certainly do think that it’s a worthy software for quickly creating landing pages.
After all.
If I didn’t like it then I most likely would have never created a review in the first place…
As I’m not about casting shade on businesses who are doing good things.
Allow me to do a quick recap of this landing page builder and some of the best aspects.
Unbounce Pros
- Simplistic landing page creation.
- 500,000 monthly unique visitors is a big plus.
- There are plenty of templates to choose from.
- Sticky bars and popups are a nice addition for increasing conversions.
- Suitable for online marketers of any experience (beginner to advanced).
And on the other hand, we have.
Unbounce Cons
- Having the ability to publish more landing pages would be helpful.
- You’ll have to pay almost double to get more advanced features.
It’s pretty challenging to fault this landing page software.
It’s not that they are 100% perfect in every way, shape, and form (no software is).
However, they put their focus mainly on landing pages and do that pretty darn well.
For example:
- Should I fault them for not being able to create sales funnels?
- Or applaud them for only focusing on landing pages?
Do you see what I mean?
All in all, here is what I have to say about Unbounce:
This landing page software was a breeze when it comes to starting, putting landing page together, and applying additional features in order to help you increase conversions.
So with that being said?
I’d recommend that you give Unbounce a shot, especially if you were already considering it.
And that should do it.
I want to say thank you for taking the time to read about what Unbounce has to offer.
Feel free to leave a comment down below if you have any questions, comments, or concerns.
Happy landing page building!

